By incorporating NFC wearables into your event, you can elevate the experience to a whole new level. NFC technology simplifies the check-in process, offers real-time analytics, and enables efficient lead retrieval and access control.
Here is a step-by-step guide on how to link an NFC wristband to an attendee, as well as a video at the end showing the process. Typically, event organizers choose to do this when the attendee checks in and enters the event.
Once you log into the CrowdPass.co app, you will arrive at your event dashboard.
1. Click on your event.
2. Click 'Attendees' on the bottom list, which opens the attendee list.
There are two ways to find an attendee in the attendee list before pairing an NFC wearable.
1. Search the attendee's name in the search bar.
2. Scan the attendee's Event Access QR Code by clicking the QR code icon on the right in the search bar.
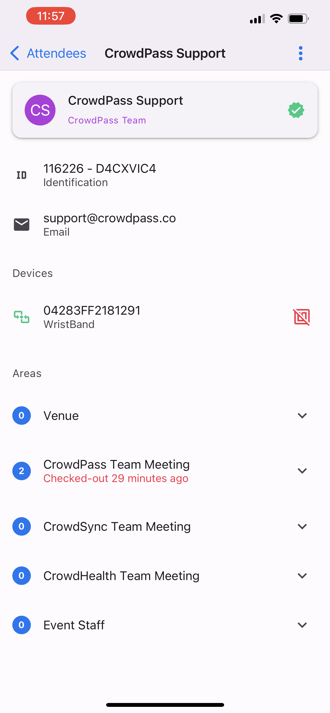
3. Open up an attendee's profile.
4. Click 'Pair NFC wristband'.
This will open a screen saying 'Ready to Scan'.
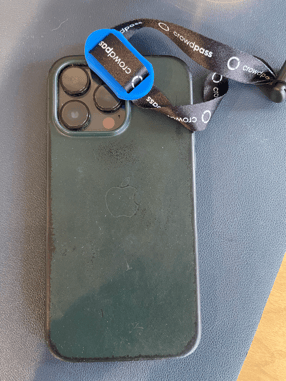
5. Hold the center of the NFC wristband (typically where the logo is) to the back of a smartphone in the top center, where the cameras are.
 .
. 
Once the signal is read successfully, it will say, 'Successfully paired NFC wristband!'.
Now the NFC wristband is paired with an attendee. As the attendee moves through the event, they can check into event areas with the NFC wristband and utilize CrowdPass' lead retrieval feature.
A video walking through the steps outlined above is below.